How to Make Your Website Secure using SSL on GoDaddy
How many of you have seen this error while trying to access a website?
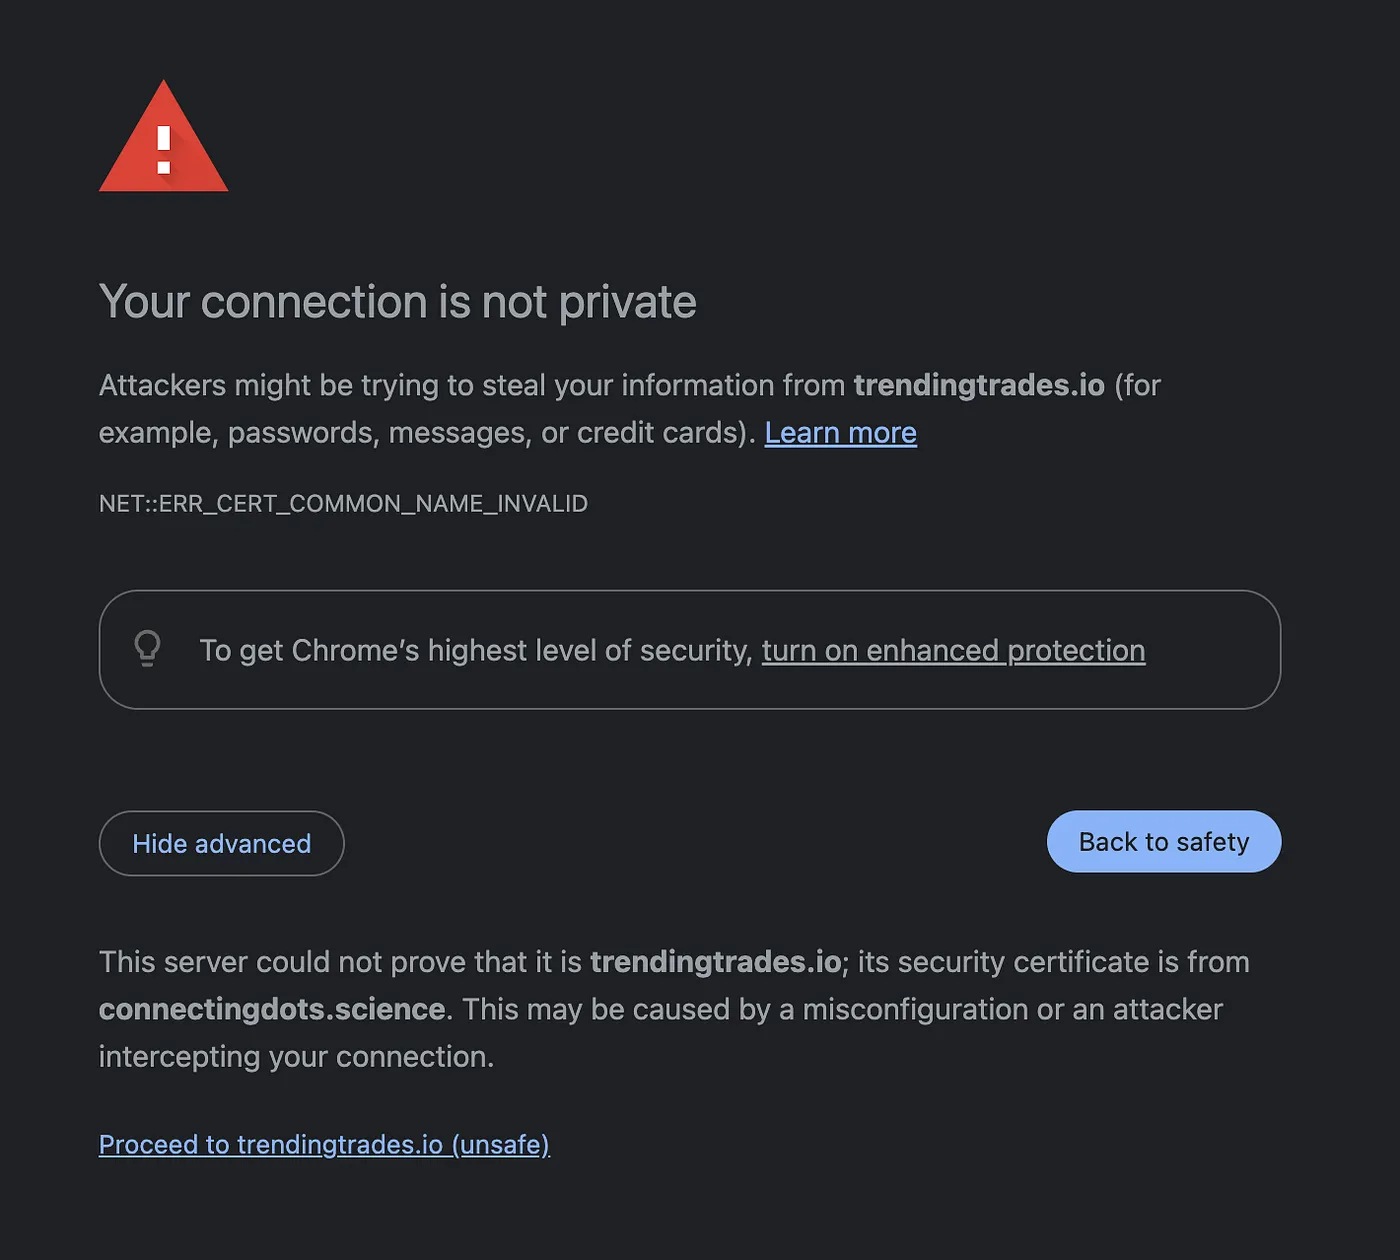
Even before I knew about SSL I had apprehensions about opening a website with this error, so my default response was "Back to Safety".
I am sure many souls more daring than me continue to proceed.
If you are on this page, I am sure you don't want me to preach the benefits of SSL. So without much ado let's get started with making your website SSL ready.
In this article, we will use my trading website (that is work in progress) https://trendingtrades.io/ to set up a SSL certificate.
As you can see in the above screenshot it is not currently secure. But since I trust the creator of this website, myself, I will use the advanced option to proceed anyway!
Now I am able to access the website, but with the warning — "Not Secure".

Even though I trust myself, many users who access this website may not. This is unfortunate, since I am really a nice guy and once they get to know me they will.
We can take care of this issue by having someone who knows me, vouch for me, so users can feel more confidence in accessing this website.
In the context of a website and SSL the entity that can vouch for my website is called a Certificate Authorities (CA). A CA generates a SSL in broadly two steps:
1. Verification Process
CAs verify the identity of the entity requesting the certificate (me). This involves checking domain ownership and, in some cases, organizational details. Depending on the level of validation, this process can range from simple domain verification to comprehensive organizational checks.
2. Certificate Generation
Once the entity's identity is verified, the CA issues an SSL/TLS certificate that includes the entity's public key, along with information about the entity and the CA. This certificate is signed by the CA's private key, creating a chain of trust.
In case of my domain trendingtrades.io I chose GoDaddy to be the authority to vouch for me and provide a SSL certificate.
Generating a Certificate Signing Request
First step in generating a SSL certificate is generating a Certificate Signing Request (CSR)
A Certificate Signing Request (CSR) is a block of encoded text that is sent to a Certificate Authority (CA), like GoDaddy, when applying for an SSL/TLS certificate. The CSR contains information about the organization and the public key that will be included in the certificate. GoDaddy uses the CSR to create and sign the certificate.
To generate a CSR for GoDaddy, open your terminal and run this command:
openssl req -new -newkey rsa:2048 -nodes -keyout wt3.key -out wt3.csr
Let's break down the command:
openssl req: This part of the command calls the OpenSSL tool and specifies that you want to create and process a certificate signing request (CSR).-new: This flag indicates that you want to create a new CSR.-newkey rsa:2048: This flag specifies that you want to generate a new private key at the same time as creating the CSR.-keyout wt3.key: This option specifies the file where the newly generated private key should be saved.-out wt3.csr: This option specifies the file where the CSR should be saved.
Enter the command to generate CSR in the terminal. The command will prompt you to enter information related to the domain you are securing. Please enter the required details when prompted.
Pawans-MacBook-Pro:ssl pmittal$ openssl req -new -newkey rsa:2048 -nodes -keyout wt3.key -out wt3.csr
Country Name (2 letter code) [AU]:US
State or Province Name (full name) [Some-State]:California
Locality Name (eg, city) []:San Diego
Organization Name (eg, company) [Internet Widgits Pty Ltd]:TrendingTrades
Organizational Unit Name (eg, section) []:
Common Name (e.g. server FQDN or YOUR name) []:trendingtrades.io
Email Address []:mitpawan@gmail.com
Please enter the following 'extra' attributes
to be sent with your certificate request
A challenge password []:
An optional company name []:TrendingTrades
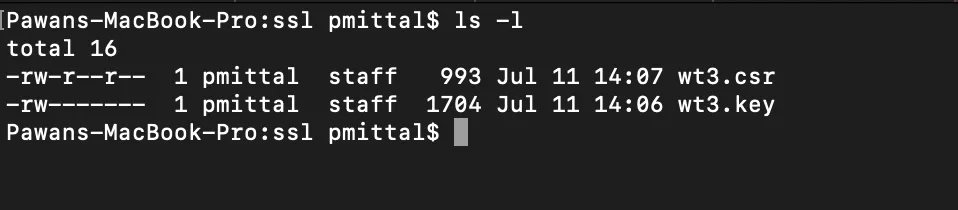
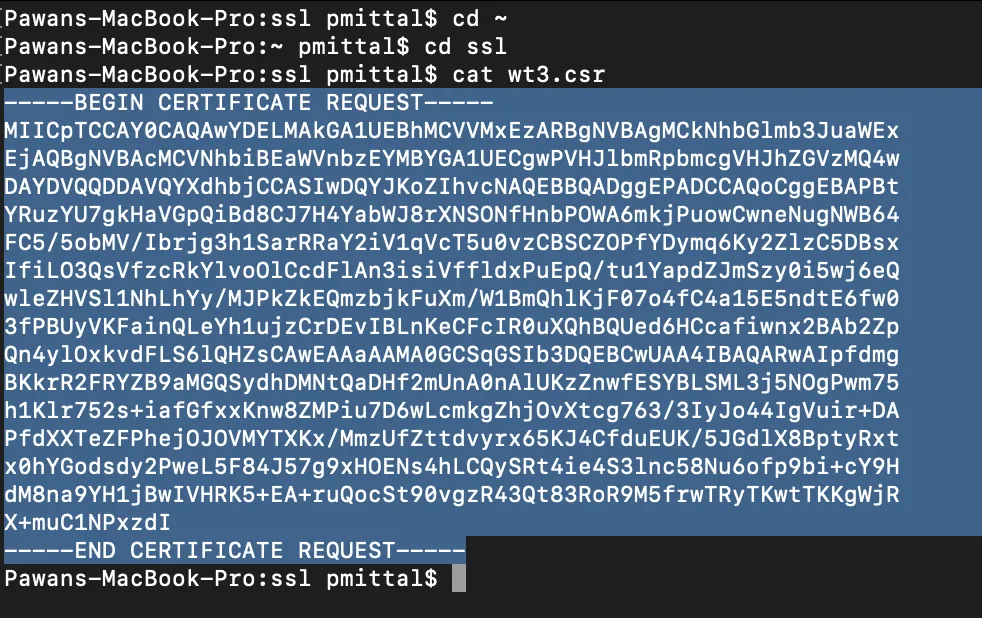
Once the generate CSR command finished executing, new CSR (wt3.csr) and a private key is generated (wt3.key)
You may view them as below:
Uploading the Certificate Signing Request on Certificate Authority website
For this step you must have an account on GoDaddy (or any other CA) and purchased a SSL Certificate.
The following steps are specific to GoDaddy account holders:
- Log into GoDaddy and go to My Products Page
- Scroll down to SSL Certificates section
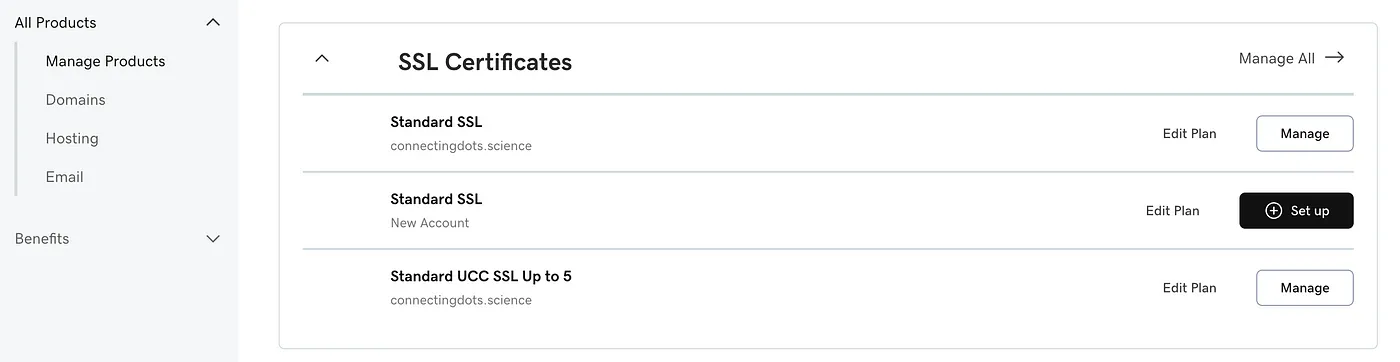
- Choose a certificate and click on Set Up. If you don't see the Set up option, please click on Manage. The absence of Set up indicates that a SSL certificate may have already been generated. But no worries! A new SSL can be generated by uploading a new CSR.
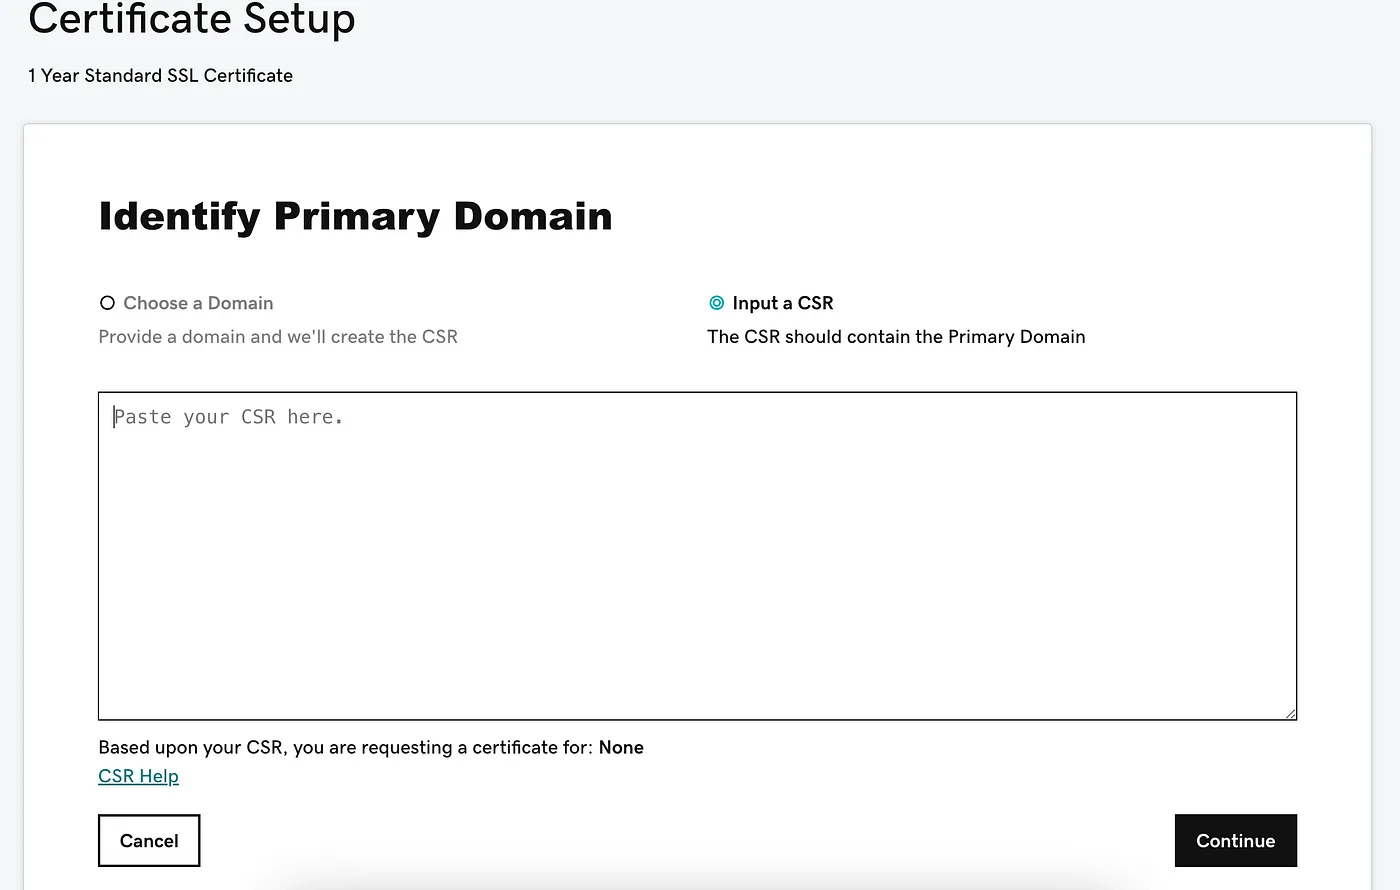
- Clicking Set up will take you to Certificate Setup page.
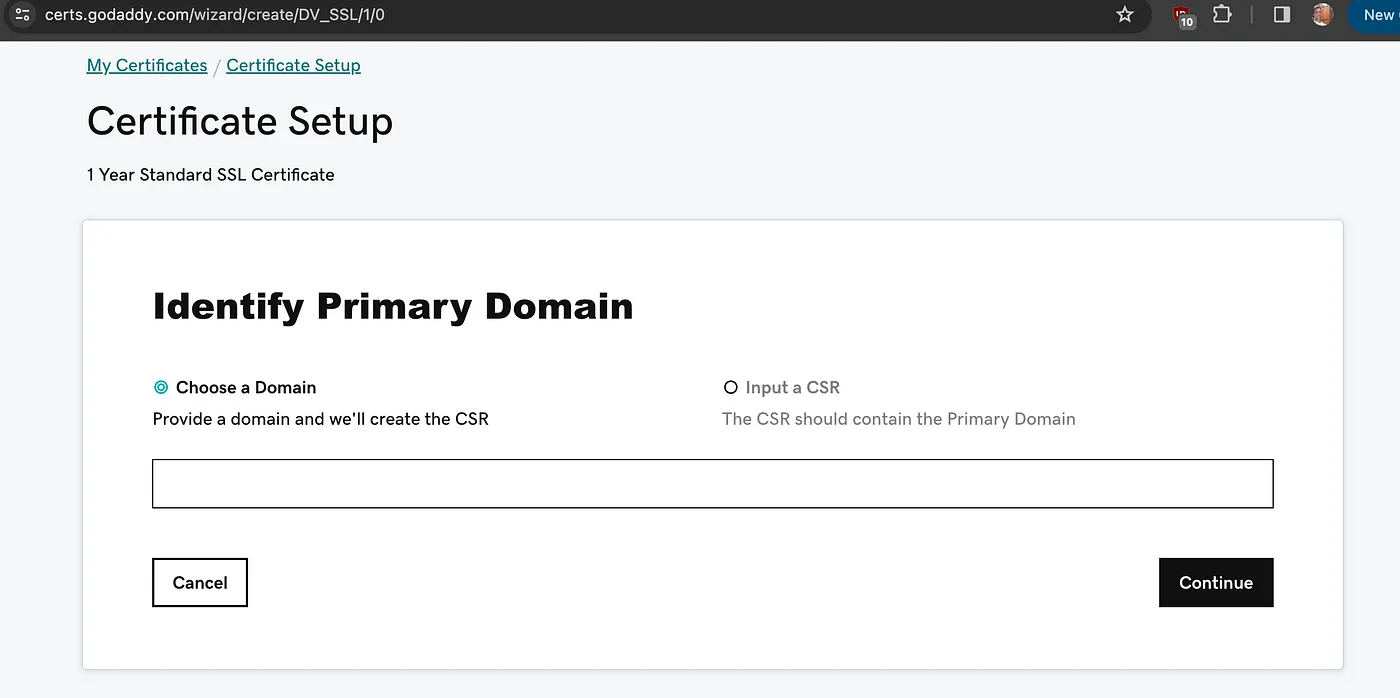
Now, I am sure there are ways to generate a CSR using "Choose a domain", but in our case since we generated a Certificate Signing Request we will use that.
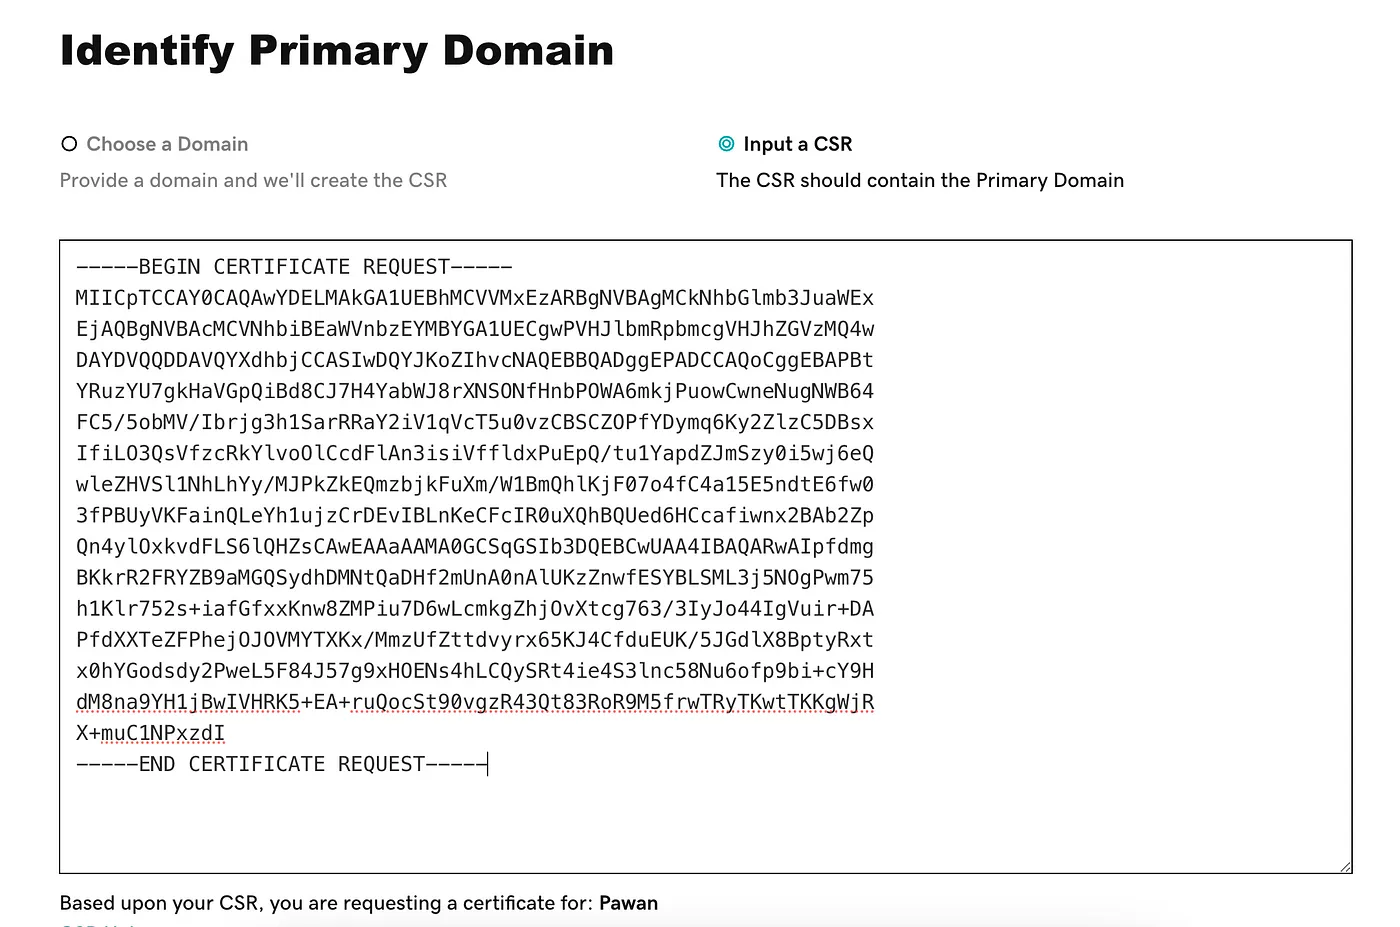
- Upload the CSR.
Copy the CSR we generated above into the clipboard and paste it into the text-box above and click on Continue.
-
If the CSR generated is valid, after clicking on Continue you will be asked to agree to GoDaddy's terms and conditions. Click on continue.
-
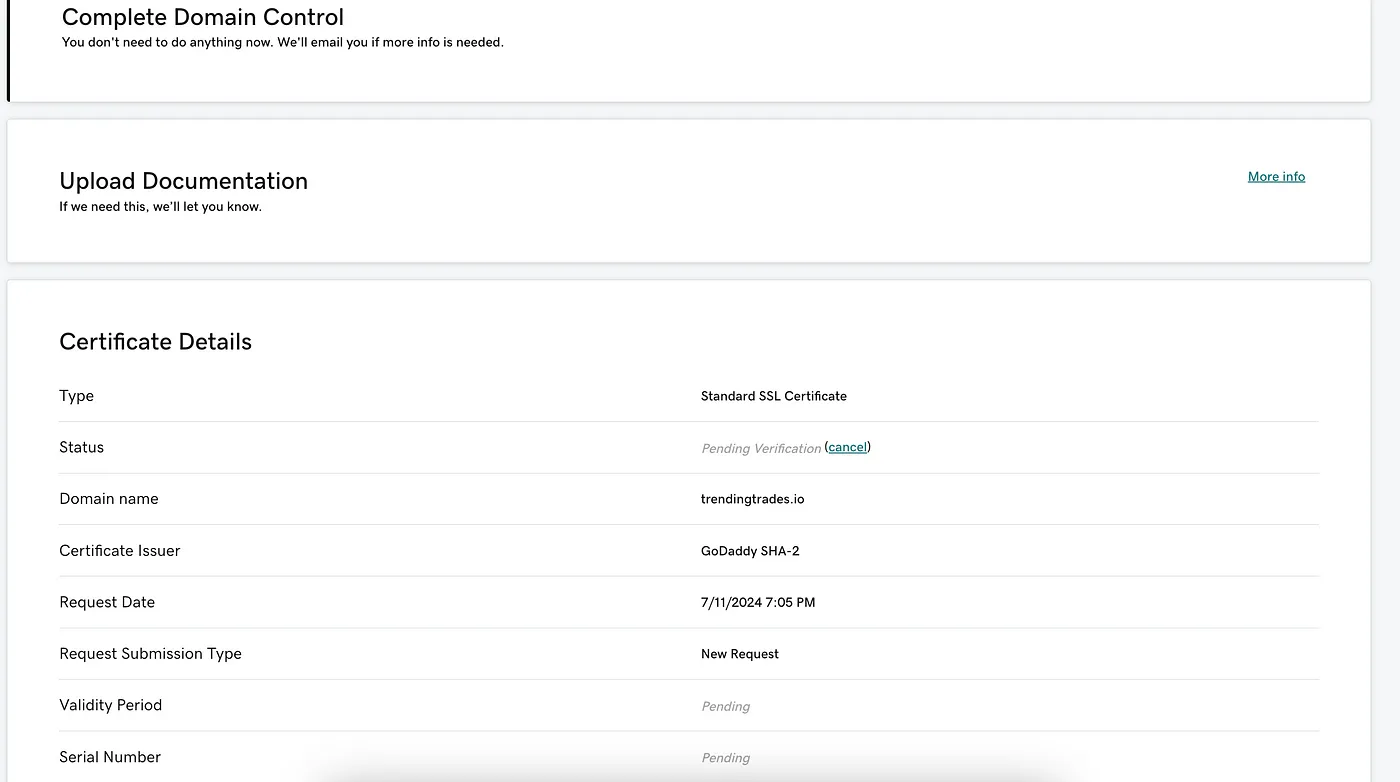
That's it. We have finished the SSL generation process. Now sit tight. GoDaddy is verifying the information you provided in the CSR. Once that information is verified, a SSL certificate will be issued.
When the SSL certificate is ready the status will change from "Pending verification" to "Certificate issued". For me it took about 2-3 minutes.
You can either refresh this page. Or, you can wait for an email from GoDaddy, which is something like this:
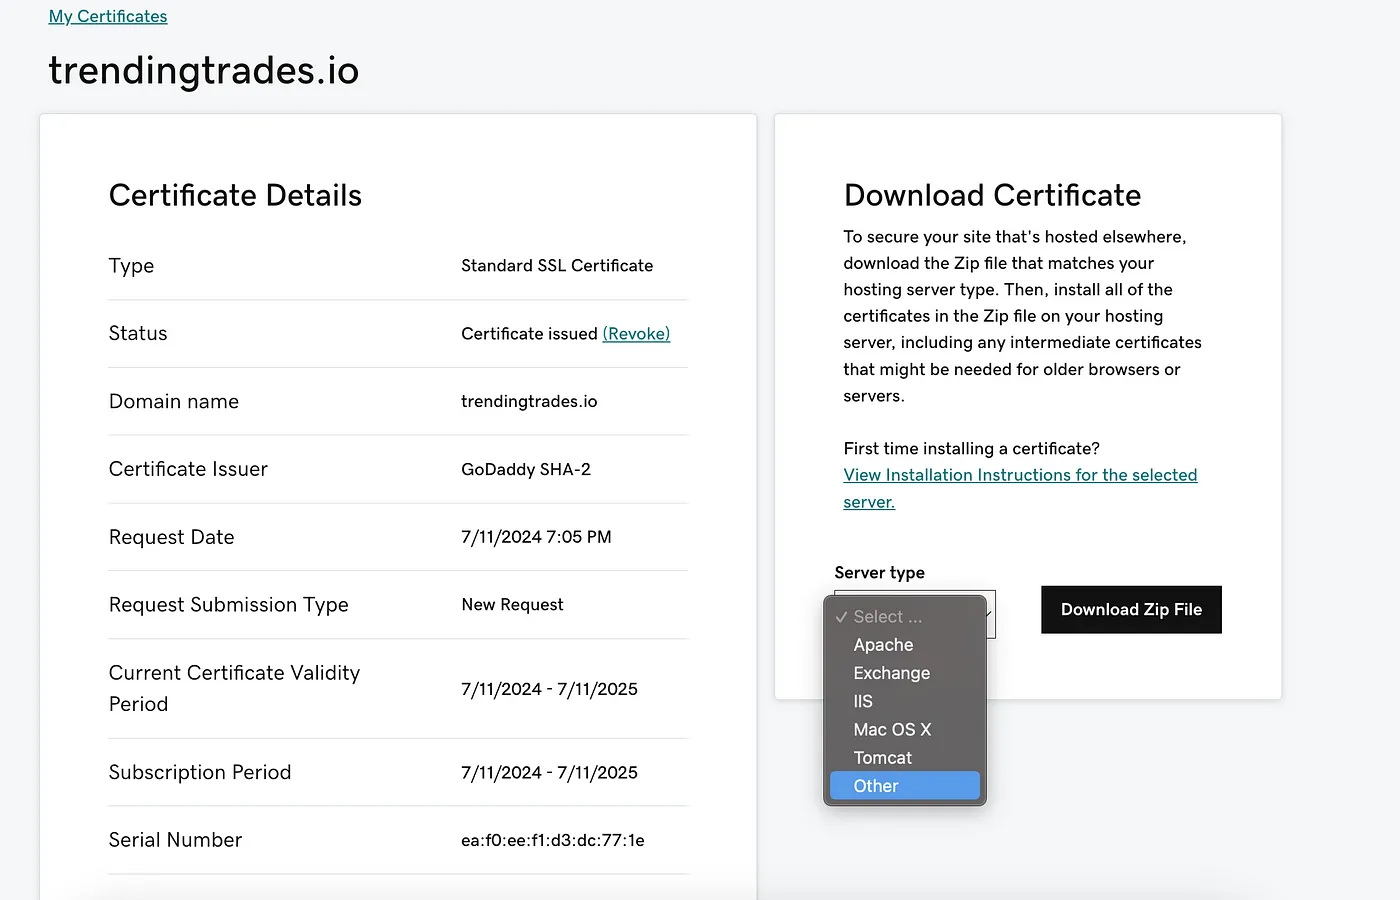
- Congratulations. Your SSL certificate is ready. You can download it for the web server of your choice. Since my website is running on NGINX, I chose "Other" from the Download Certificate dropdown.
Installing the SSL certificate on your web server
1. Moving the SSL key and certificate on the host box
So far, we have generated and downloaded a SSL certificate by providing a Certificate Signing Request to a Certificate Authority.
While generating CSR I provided the common name to be trendingtrades.io
So when I downloaded the certificate the name of the file was trendingtrades.io.zip
When I unzipped this file it has three files:
eaf0eef1d3dc771e.crt is the certificate.
I moved this certificate in the same folder on my local workstation where the CSR and the private SSL was created.
Pawans-MacBook-Pro:trendingtrades.io pmittal$ cp eaf0eef1d3dc771e.crt ~/ssl/wt3.crt
Pawans-MacBook-Pro:trendingtrades.io pmittal$ cd ~/ssl/
Pawans-MacBook-Pro:ssl pmittal$ ls
wt3.crt wt3.csr wt3.key
As we can see, now we have wt3.key and wt3.crt in the folder ~/ssl
Next step is to copy these files into the box where our web server is running. This can be done using FTP or SCP.
Pawans-MacBook-Pro:ssl pmittal$ scp wt3.crt pawanmit@HOST_IP_ADDRESS:~/ssl_keys/
wt3.crt                                                                                                                                                    100% 2358     3.7KB/s   00:00
Pawans-MacBook-Pro:ssl pmittal$ scp wt3.key pawanmit@HOST_IP_ADDRESS:~/ssl_keys/
wt3.key                                                                                                                                                    100% 1704     4.5KB/s   00:00
Please replace HOST_IP_ADDRESS with the IP address of your server box.
Now when you SSH into your server box and cd into ~/ssl_keys you should see the wt3.crt and wt3.key
Pawans-MacBook-Pro:wt3 pmittal$ ssh pawanmit@HOST_IP_ADDRESS
Last login: Fri Jul 12 00:40:14 2024 from 106.217.16.116

[pawanmit@63 ~]$ cd ~/ssl_keys/
[pawanmit@63 ssl_keys]$ ls -lt
total 24
-rw-r--r--  1 pawanmit pawanmit 1704 Jul 12 00:58 wt3.key
-rw-r--r--  1 pawanmit pawanmit 2358 Jul 12 00:58 wt3.crt
2. Update webserver configuration
Last step is to inform the web server of our intention to go secure. This ensures that all traffic is securely encrypted by redirecting users from HTTP to HTTPS.
On nginx it is done using ssl_certificate_key and ssl_certificate directives.
server {
    listen 443 ssl;
    server_name trendingtrades.io;

    ssl_certificate     /home/pawanmit/ssl_keys/wt3.crt;
    ssl_certificate_key /home/pawanmit/ssl_keys/wt3.key;

    root /var/www/wt3/wt3web/build/;
    include /var/www/wt3/wt3web/nginx.conf;
}
This is my actual web server (nginx) configuration file.
ssl_certificate: This directive specifies the path to the SSL/TLS certificate file.ssl_certificate_key: This directive specifies the path to the private key file corresponding to the SSL/TLS certificate.
Please note that the directive values point to the folders where we secure copied (scp) the wt3.crt and wt3.key files.
3. Restarting the server
Now, let's restart the web server, and see the magic happen:
[pawanmit@63 nginx]$ sudo systemctl restart nginx
Now when I go to trendingtrades.io I am not greeted by the warning that the connection is not private. Installing the SSL certificate and key ensures that all data between client browser and the server is encrypted. This ensures that even if the data is intercepted, it cannot be read by unauthorized parties.
I hope this article helps you making your website secure little less painful. If you have any questions please get in touch. I will be thrilled to answer your questions.